
1 Foreword
The following tutorial have been successfully reproduced on macOS 12 and 13 (Monterey and Ventura), and Pop! OS 22.04 (Ubuntu-based).
Please see the requirements below (Section 1.1) and the useful links (Section 5) for external resources or tutorials.
When using text in CAPITAL_LETTERS inside a code block/line, it usually means that you need to replace those with your own variables. For example, for a code like mkdir YOUR_FOLDER_NAME, if you want your folder to be called kart_example, you will need to write mkdir kart_example.
During the Getting Started (Section 2) and Getting Started with Kart (Section 3) sections, the examples will provide mostly terminal commands, since it will be impossible to provide instructions for all the existing graphical file managers (e.g. Finder, Windows Explorer, Dolphin, Nautilus, etc.). You can use a graphical file manager, of course, the textual documentation should be clear enough for that workflow too. Kart commands (identified by the kart prefix) should of course be run in the terminal.
In the Working with Kart (Section 3.5) section, we will instead use the graphical plugin for QGIS but, when possible, corresponding terminal commands will be given. If you are unsure about some commands, the kart command reference is an excellent documentation, otherwise man pages are available for individual commands using kart COMMAND --help, e.g. kart status --help.
While Kart can also be used to version raster data, this tutorial will only cover the vector dataset usage.
We use Github here as our git forge and we will usually mention it throughout the text. However, it is completely possible to reproduce this tutorial on other forges such as Gitlab or Codeberg. When possible we will mention guides for those forges as well.
While this tutorial is focused on QGIS, editing with ArcGIS/GDAL, etc. is supported by kart, although you will not have access to the graphical plugin.
We noticed some difficulties in getting kart to work properly on older versions of macOS, likely because of outdated versions of git, xcode, xcode command line tools, etc. For a smoother experience we recommend using AT LEAST macOS 12 (Monterey) and XCode 13.
On Linux, if you are running the Flatpak version of QGIS, the kart plugin (see below) might have problems finding the kart binary. Switching to a different version of QGIS (e.g. following these instructions) seems to solve the issue, otherwise you might need to see if the issue can be solved using some apps such as Flatseal.
While this tutorial is presented here in a stable state, it is by no means finalized, we will keep adding and correcting things based on our continuing experience with kart and the evolution of kart itself.
1.1 Requirements
To avoid an endless guide, the instructions and tutorial below assumes the following:
You are familiar with git and you have git installed on your machine (there are many guides available online, for example de1v.to, or Atlassian, or this other one). If you don’t have git installed, please follow the instruction on the Git website.
You have at least one authenticated profile for Github (see https://docs.github.com/en/get-started/getting-started-with-git) or for your git forge of choice (e.g. ).
You are are familiar or at least not afraid of using a terminal application (e.g. Terminal.app, Powershell, Konsole, Gnome Terminal, Kitty, Wezterm, Alacritty).
You are familiar with QGIS and its interface, and you have QGIS 3.16 or higher installed on your machine (otherwise please install it from the QGIS website).
2 Getting Started
2.1 Install Kart
Go to https://kartproject.org/ and in the dropdown menu under “Download for your OS” select the appropriate package for your OS. Then, open the file and follow the instruction to install the software.
Alternatively, platform specific instructions follows below. These instructions are taken from the kart official documentation, please always double check the source website before running terminal commands:
Windows
Download the .msi installer from the release page.
macOS
Download the .pkg installer from the release page.
Or use Homebrew to install: brew install koordinates/kart/kart --cask
Linux
For Debian/Ubuntu-based distributions, download the .deb package from the release page and install via dpkg -i kart_*.deb
For RPM-based distributions, download the .rpm package from the release page and install via rpm -i kart-*.rpm
Testing install
Test your install by running kart --version in your terminal. If you want, you can follow the Quick Start guide in kart documentation and running kart status at one point.
3 Getting Started with Kart
3.1 Set up
If you have never used git you should run the following commands (replacing the quoted text with your actual information):
kart config --global user.email "you@example.com"kart config --global user.name "Your Name"To understand what the above do, you can take a look at the Getting Started with Git guide from the Github Docs, specifically the parts about Setting up your username and your commit email address.
If you have already used git, chances are you have the above already set-up, and you can continue on.
Create an empty folder where your kart projects will live and move into it:
mkdir kart-workflow && cd kart-workflowAs with git, there are different ways in which to get started with kart. Here we will take a look at the most likely (in our opinion) cases:
We have already existing data and we want to start versioning from scratch.
We have versioned data already existing on a remote repository and we want to import those data on our machine.
3.2 A word about HTTPS and SSH
HTTPS connection to github and usually other forges requires additional steps to avoid having git prompting you with a username and password request every time you interact with the server. This is usually solved by setting-up a Personal Access Token or by caching your credentials in Git. Note that failing to cache or save the credentials on your machine in some ways may result in an error when pushing to a remote repository from the QGIS interface.
For a more seamsless experience (in our opinion), you can follow this guide to setup an SSH key pair for Github, but guides are also available for Gitlab and Codeberg.
3.2.1 Generating SSH keys (Optional)
The guides above for creating and adding an SSH key should be exhaustive enough, but we can repeat some steps here. These steps below are general but have been reproduced on MacOS only.
If you have no previous experience, follow the guide above, these steps are not meant to replace it.
Generate a new ssh key
ssh-keygen -t ed25519 -C "your_email@example.com"(the mail should be the same used for your github account) and follow the on-screen instructions for inputting a passphrase.Ensure the ssh-agent is running
eval "$(ssh-agent -s)"If you are on macOS 10.12.2 or later, manually edit the ~/.ssh/config file as explained in the same guide.
Add the ssh key to the ssh-agent
ssh-add ~/.ssh/id_ed25519(if you are on macOS, you can store the ssh passphrase in your keychain by runningssh-add --apple-use-keychain ~/.ssh/id_ed25519)Add the key to your github account following the respective guide.
3.3 Example 1: use an empty Kart repository
3.3.1 Download data
Download the sample data. You can download this file anywhere on your machine.
You can get the data from the same folder where this tutorial lives, by going to this link.
Alternatively, you can use the following CLI tools by pasting the commands in your terminal (Aria2 is likely not installed in your system).
Wget
wget https://github.com/UnitoAssyrianGovernance/kart4arch/raw/main/static/kart-workflow-example.gpkgAria2
aria2c https://github.com/UnitoAssyrianGovernance/kart4arch/raw/main/static/kart-workflow-example.gpkgCurl
curl -O https://github.com/UnitoAssyrianGovernance/kart4arch/raw/main/static/kart-workflow-example.gpkg3.3.2 Import data in Kart
Create an empty folder on your machine and move inside that folder (you can use “kart-tutorial” or replace it with your own folder name). Be sure to copy the absolute path of where you saved your geopackage before (the .gpkg extension MUST be included).
kart init kart-tutorial --import GPKG:path/to/your/geopackage.gpkgFor example, if you created the kart-workflow folder in the above steps, and you are on MacOS, your command will look like (run inside the kart-workflow folder):
kart init kart-tutorial --import GPKG:kart-workflow-example.gpkgThe terminal should output something like this (cut for convenience, your output will be longer)
Initialized empty Git repository in path/to/kart-workflow/kart-tutorial/.kart/
Starting git-fast-import...
Importing 4 features from kart-workflow-example.gpkg:archaeo_locationquality to archaeo_locationquality/ ...
Added 4 Features to index in 0.0s
Overall rate: 1390 features/s)
Closed in 0s
Importing 106 features from kart-workflow-example.gpkg:archaeo_periodisation to archaeo_periodisation/ ...
Added 106 Features to index in 0.0s
Overall rate: 21077 features/s)
Closed in 0s
[...]
Creating GPKG working copy at kart-tutorial.gpkg ...
Writing features for dataset 1 of 12: archaeo_status
archaeo_status: 100%|█████████████████████████████████████████████████████████████████| 8/8 [00:00<00:00, 11679.23F/s]
[...]3.4 Example 2: Clone an existing Kart repository
Do not use standard git commands (git clone) or Github CLI (gh repo clone) or any other similar commands or CLI tools to clone the repository, as this will not work as intended. Use only the kart clone command.
3.4.1 Clone the repository
We provide a versioned github repo ready to clone.
3.4.1.1 Cloning with HTTPS
kart clone https://github.com/UnitoAssyrianGovernance/kart-tutorial.gitYou can use your own folder name instead of the default “kart-tutorial” by adding a name at the end of the command, e.g. kart clone https://github.com/UnitoAssyrianGovernance/kart-tutorial.git kartproject
3.4.1.2 Cloning with SSH
kart clone git@github.com:UnitoAssyrianGovernance/kart-tutorial.git3.5 Working with Kart
Run kart status , if you see something like
On branch main
Nothing to commit, working copy cleanyou are good to go, the repository has been correctly initialized or cloned. If not, please repeat the above steps carefully.
3.5.1 Install the Kart QGIS Plugin
Kart comes with a useful plugin for QGIS. The source code for this plugin is available on Github. To install the latest version of the plugin, use the QGIS Plugin Manager and search for the Kart plugin. Alternatively, you can get the latest version from the release page, then open the QGIS Plugin manager and install the downloaded zip file.
As long as you have kart installed, the plugin can also take care of creating a new repo, cloning an existing one (i.e. the steps we did above), etc. The plugin has an excellent documentation with substantial graphical examples, so we link to the official docs instead of rewriting our own.
3.5.2 Set up the plugin
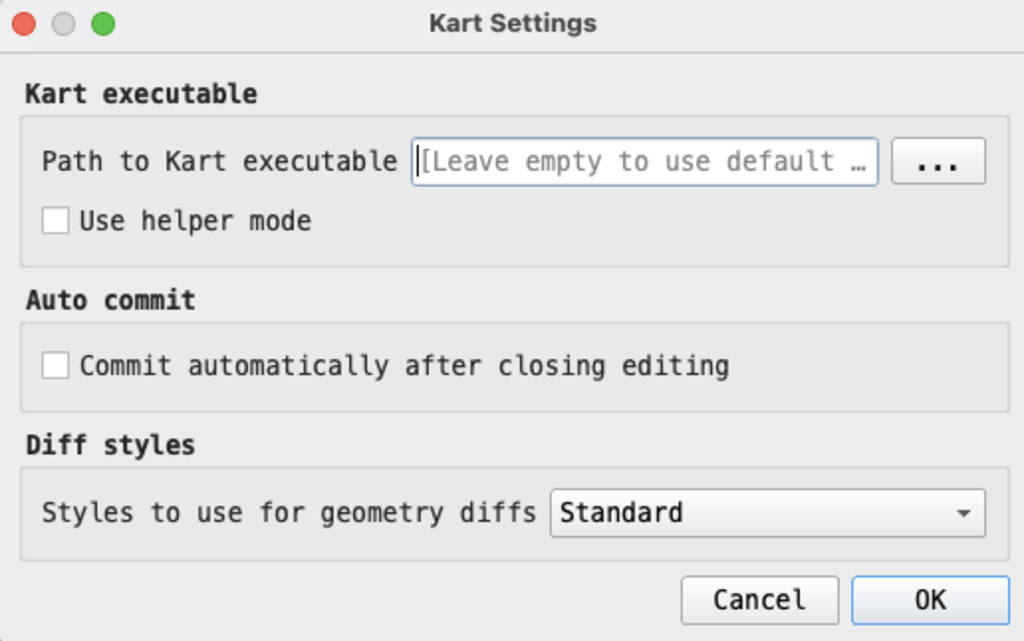
Not much setup is needed, the plugin should identify the kart binary automatically. If not, go to Plugins > Kart > Settings menu to open the settings dialog. In the Kart executable folder field, enter the path to your Kart executable. If the Kart folder is not configured, the Kart plugin will use the default install locations, as follows:
Windows:
%PROGRAMFILES%\Kart\OSX:
/Applications/Kart.app/Contents/MacOS/Linux:
/opt/kart/
We also recommend toggling off the option “Commit automatically after closing editing”. Depending on your editing workflow, you might end up with hundreds of commits adding one point each without realizing. Of course, this means that you will have to remember to commit your edits manually.
When changes have been done, close the plugin dialog box with “Ok”.
3.5.3 Connect to a local repository
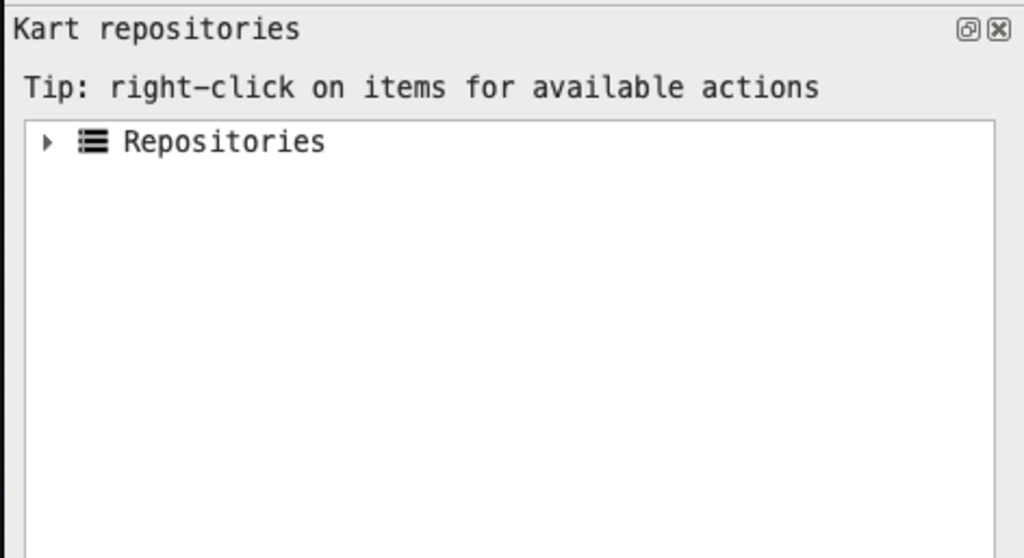
If a side panel has not already appeared, click on Plugins > Kart > Repositories to open the kart panel. The panel will look empty, but we will populate it with the repository we created before.
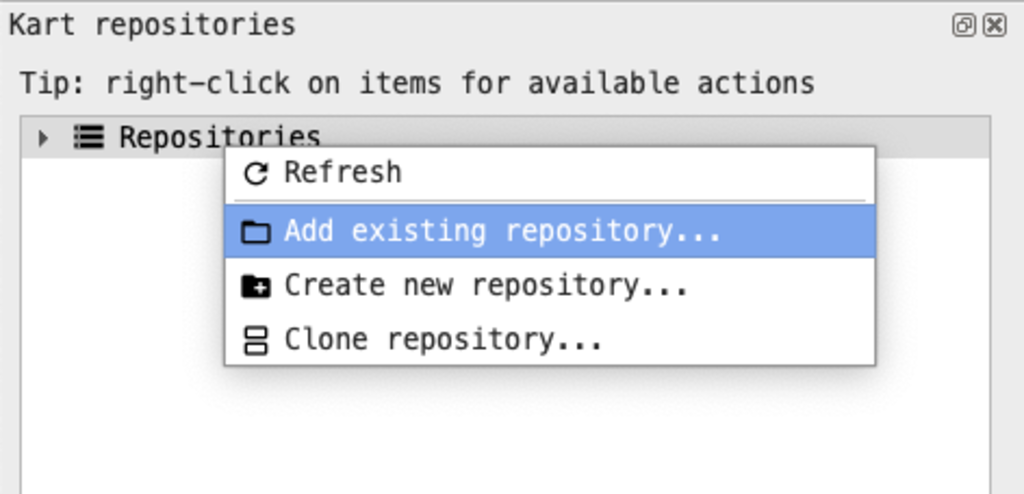
In order to do so, right click on “Repositories”. You will see a list of options: the last two (Create new repository and Clone repository) are graphical replacement to the steps we did before (Section 3.3 and Section 3.4).
Click on Add existing repository… and navigate to the kart-workflow folder we created before, then click on “Open”.
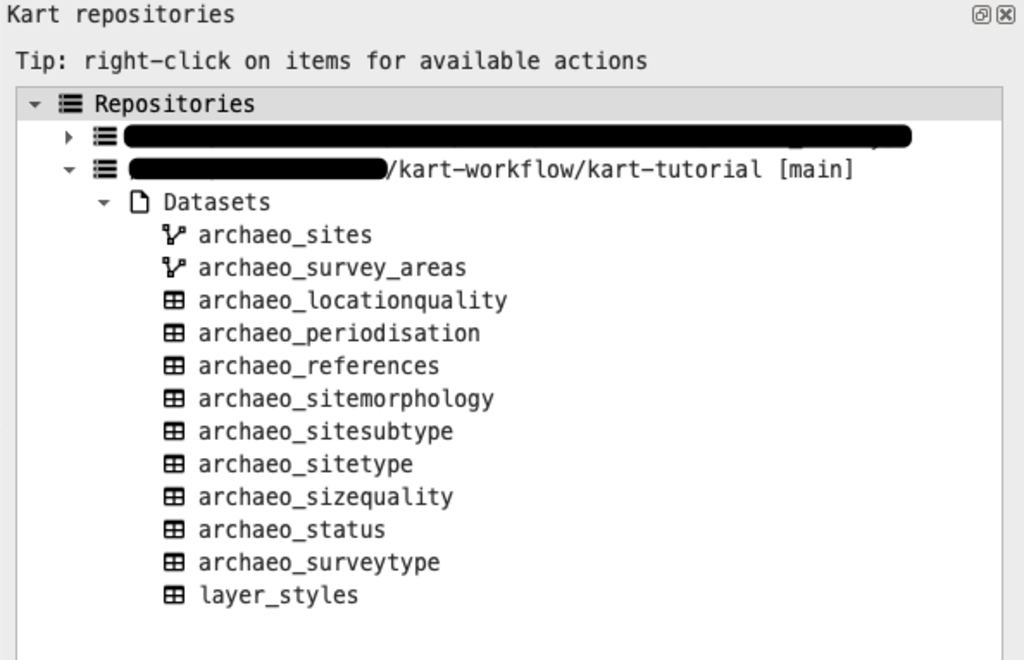
You will see the repository path now listed inside the panel under the name path/kart-workflow/kart-tutorial [main]. The [main] bit indicates the branch on which we are working (just as the git branches, more on this on the kart documentation and below in Section 3.6.1).
3.5.4 Load data inside the project
What you connected to is what kart calls working copy, i.e. a file living on your computer that you can interact with through GIS. Kart uses different working copy types, in our case the Geopackage working copy.
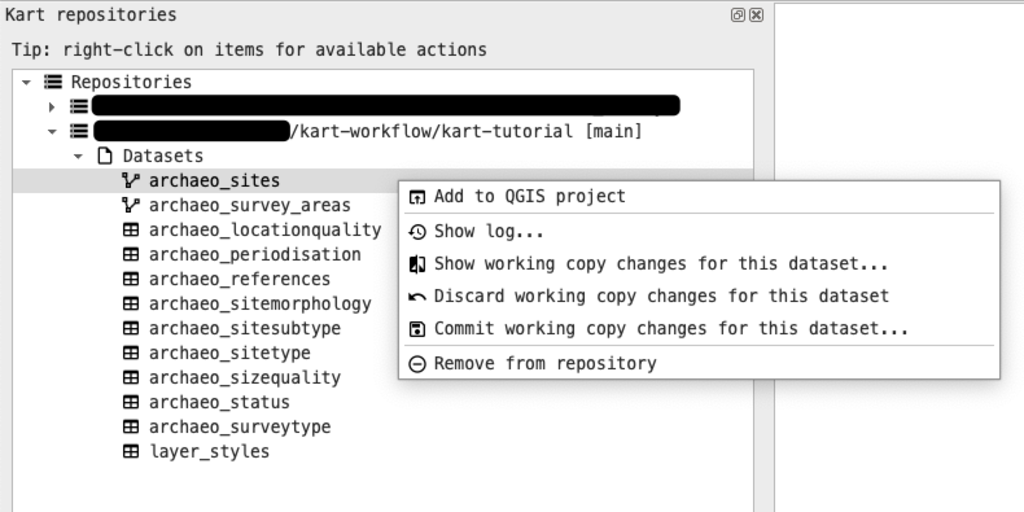
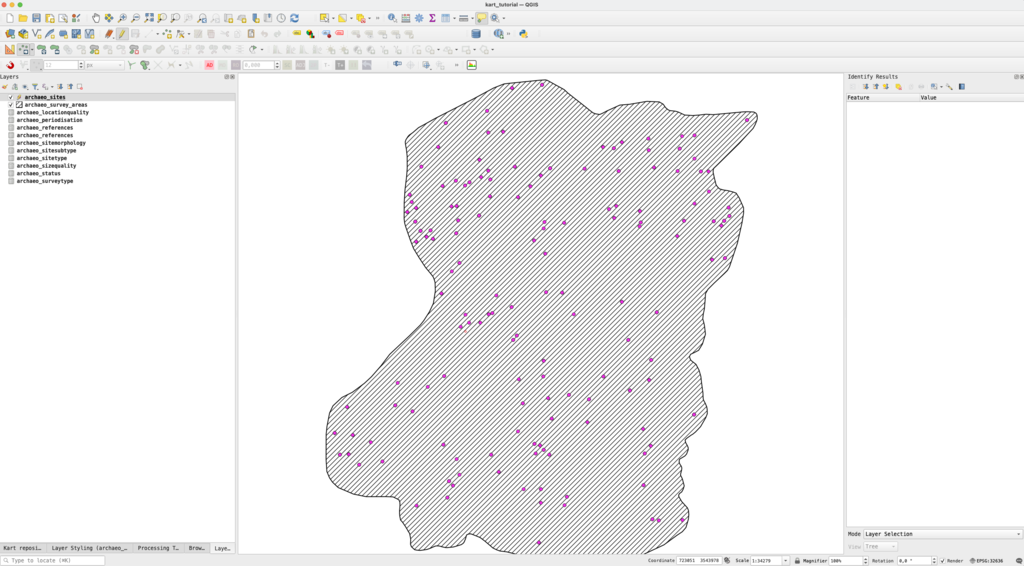
To add the layers to our QGIS project, expand the repository tree by clicking on the arrow button on the left in the kart panel. Right-click on the archaeo_sites layer and click on Add to QGIS Project. A point layer should appear on the map and the CRS should change to EPSG:32636. Add also all the other layers (you should have 10 tabular layer and another 1 geometry layer. Add all of them except the layer_styles layer. These table layer are background data useful for populating records in the main layer (archaeo_sites) through QGIS value relation widgets.
3.5.5 Add new geometry to existing layers
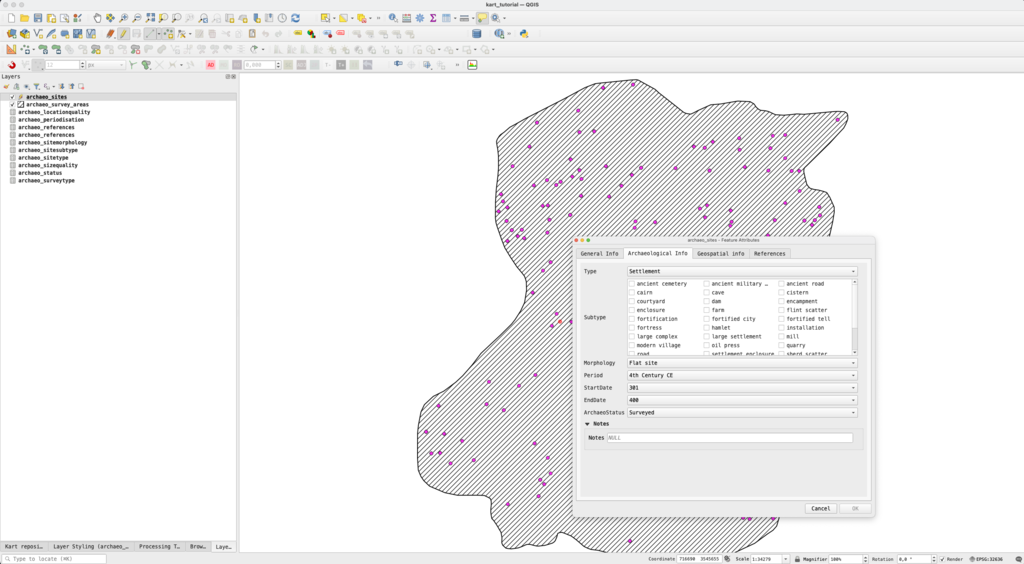
You can now proceed to add new data as you would do normally in QGIS. Toggle the editing for the archaeo_sites layer and click on the Add Point Feature button. Click anywhere and add a new point. Fill the attribute table however you like. The tab structure you will see in the new feature prompt is thank to QGIS attribute form feature, and because the style of the layer is saved inside the geopackage, and versioned in kart as well (this was the layer_styles layer present in the repository listing in the kart panel.
Save the edits by either closing the editing tool or clicking on the Save Layer Edits button.
3.5.6 Edit an existing geometry
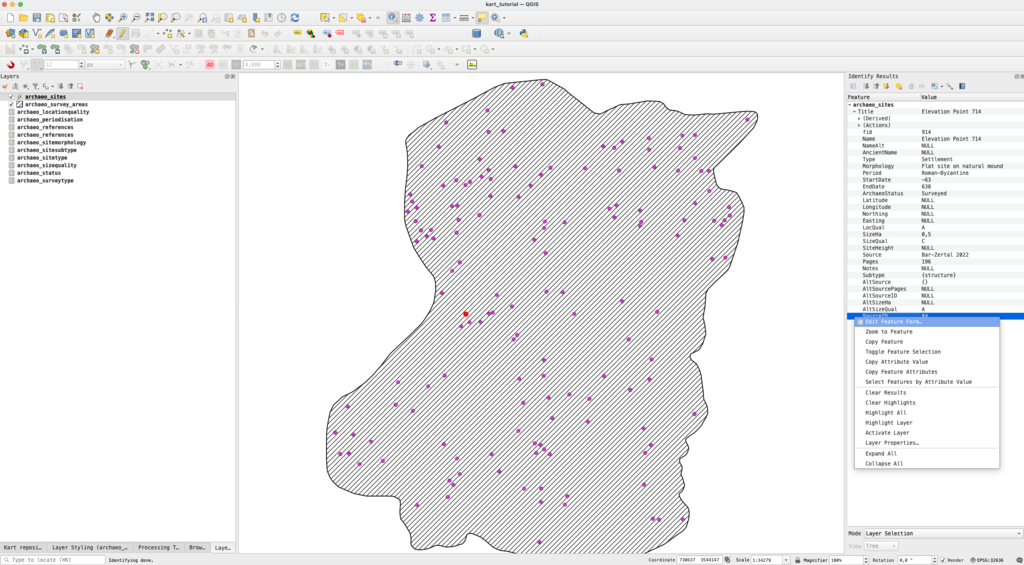
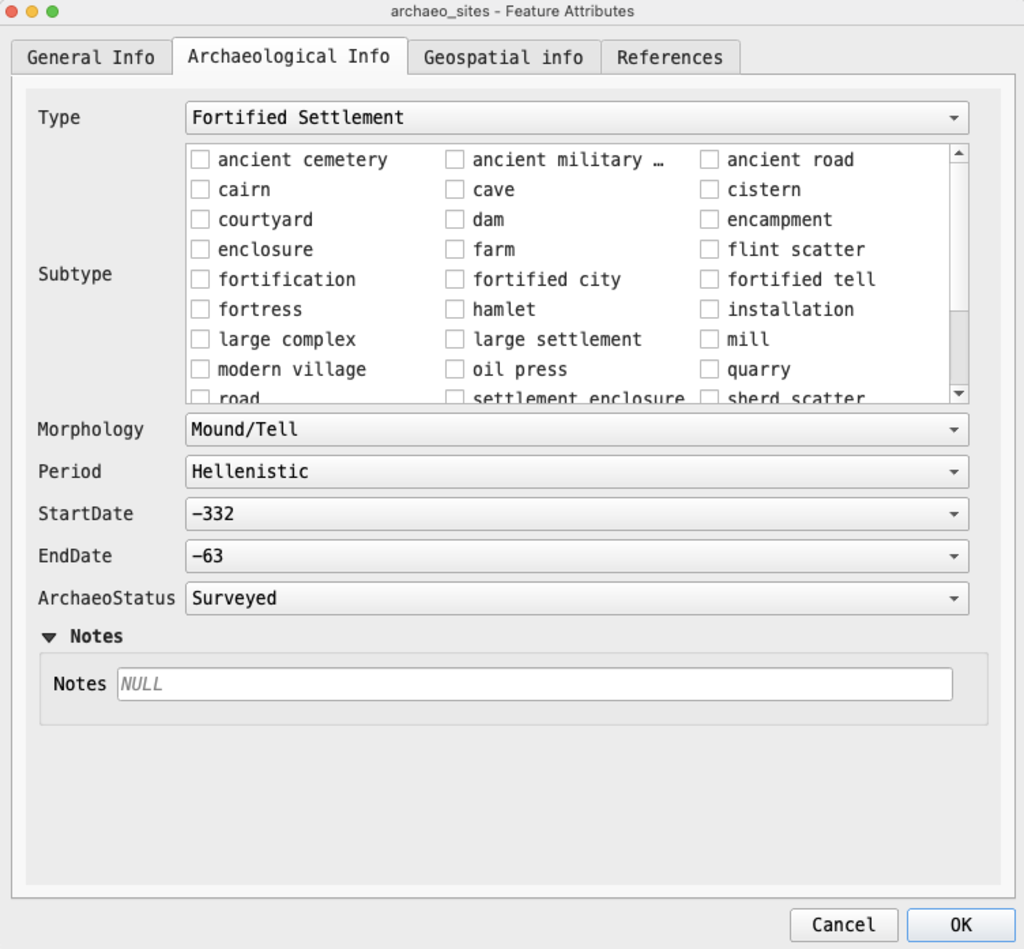
Let’s edit an existing point now, for example by changing its position and modifying some attributes. Use the identify features tool to quickly access the attribute table of a point of your choice, and right click on the identify panel to bring up a contextual menu. From this menu select Edit Feature Form. Edit the attribute table, e.g. changing the site type or the periodization, and saving your edits.
Now let’s also change the location of one of the points. It can either be the same one or another, but for an easier visualization later, it might be best to edit points near the one we added before. Use the move feature tool to do it and move a point a bit further from its actual location, saving the edits after.
3.5.7 Inspect working copy changes
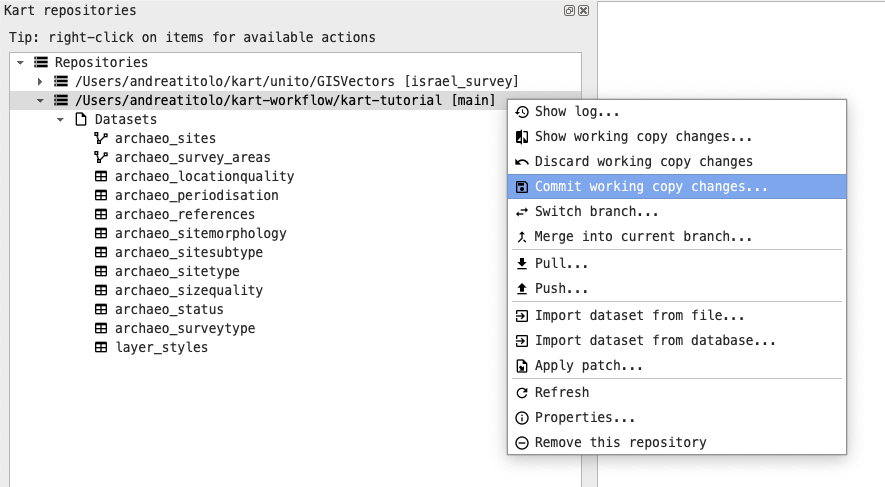
One of the interesting aspects of Kart is the possibility of inspecting changes before commits. The QGIS plugin in particular offers a way of graphically visualize changes, both on a 2D map or in a table layout. To do so, return to the kart repository panel and right-click on the repository name, then click on the Show working copy changes… button (you can also right-click on a single layer to inspect changes only for that one).

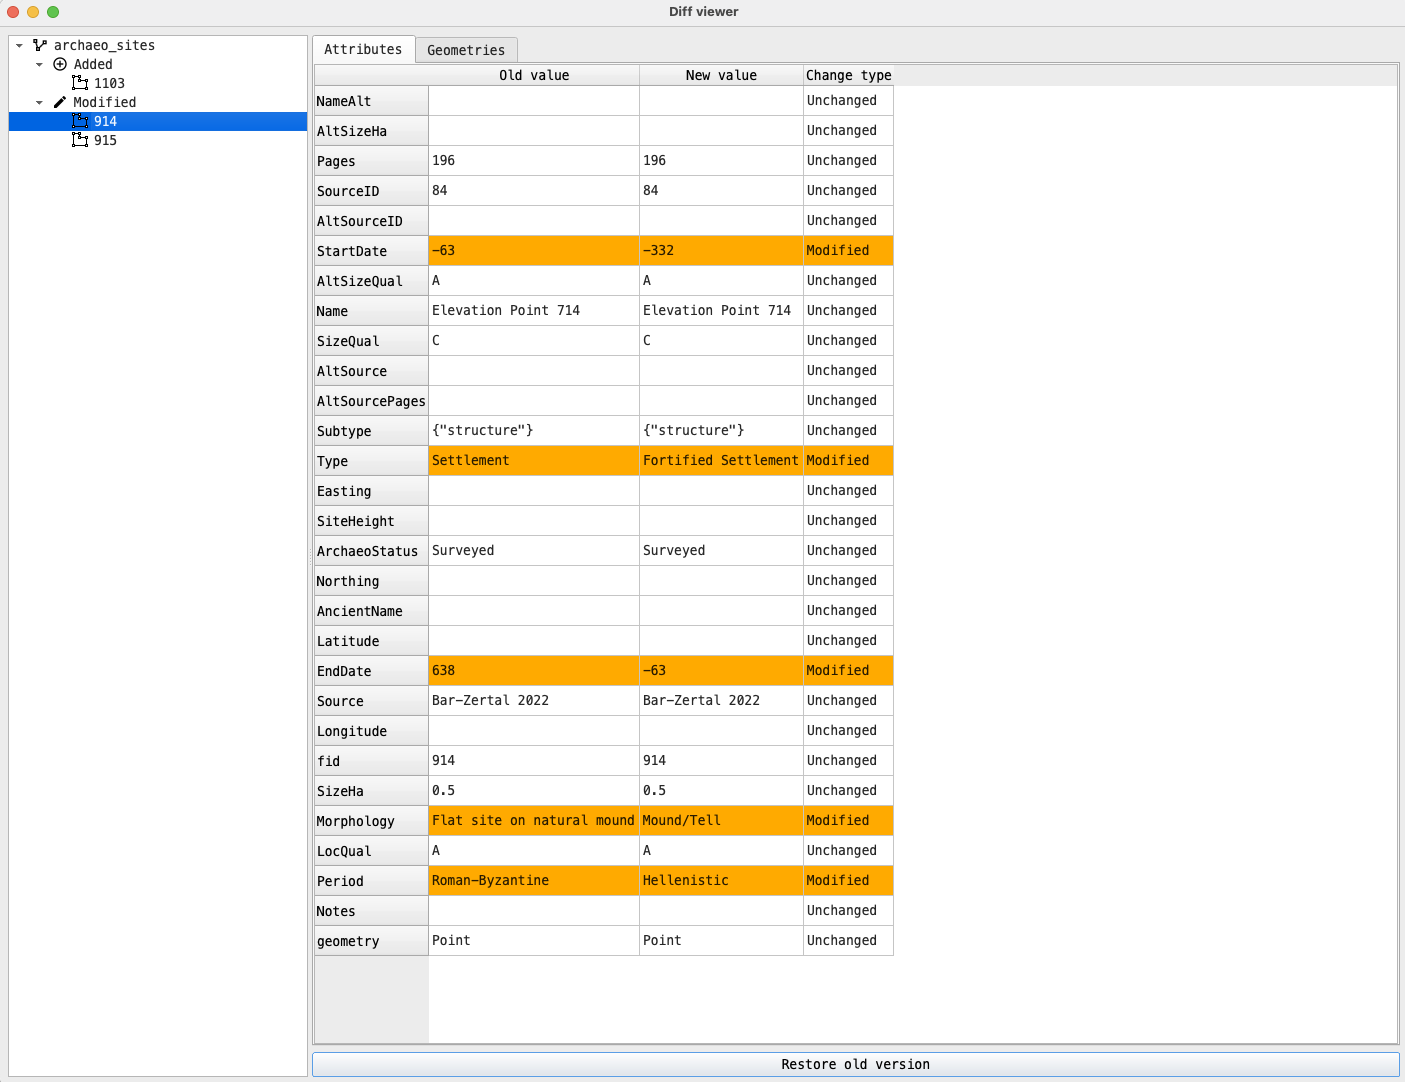
The visual diff viewer panel will open. On the left we can see (in a tree-like structure) the layer that was edited (archaeo_sites, there would be more if we had edited more than one layer), the type of change (Added, Modified)m and the primary key of the added/modified entry. On the right, there are two types of diffs available, the Attributes table, and the Geometries tab. For the Added feature, the attribute table will be all green (as these are all new entries), and the geometry tab will not be much useful. However, if we switch to the Modified features, we can see that kart highlights the rows that have been modified in a convenient table with Old/New value pairs.
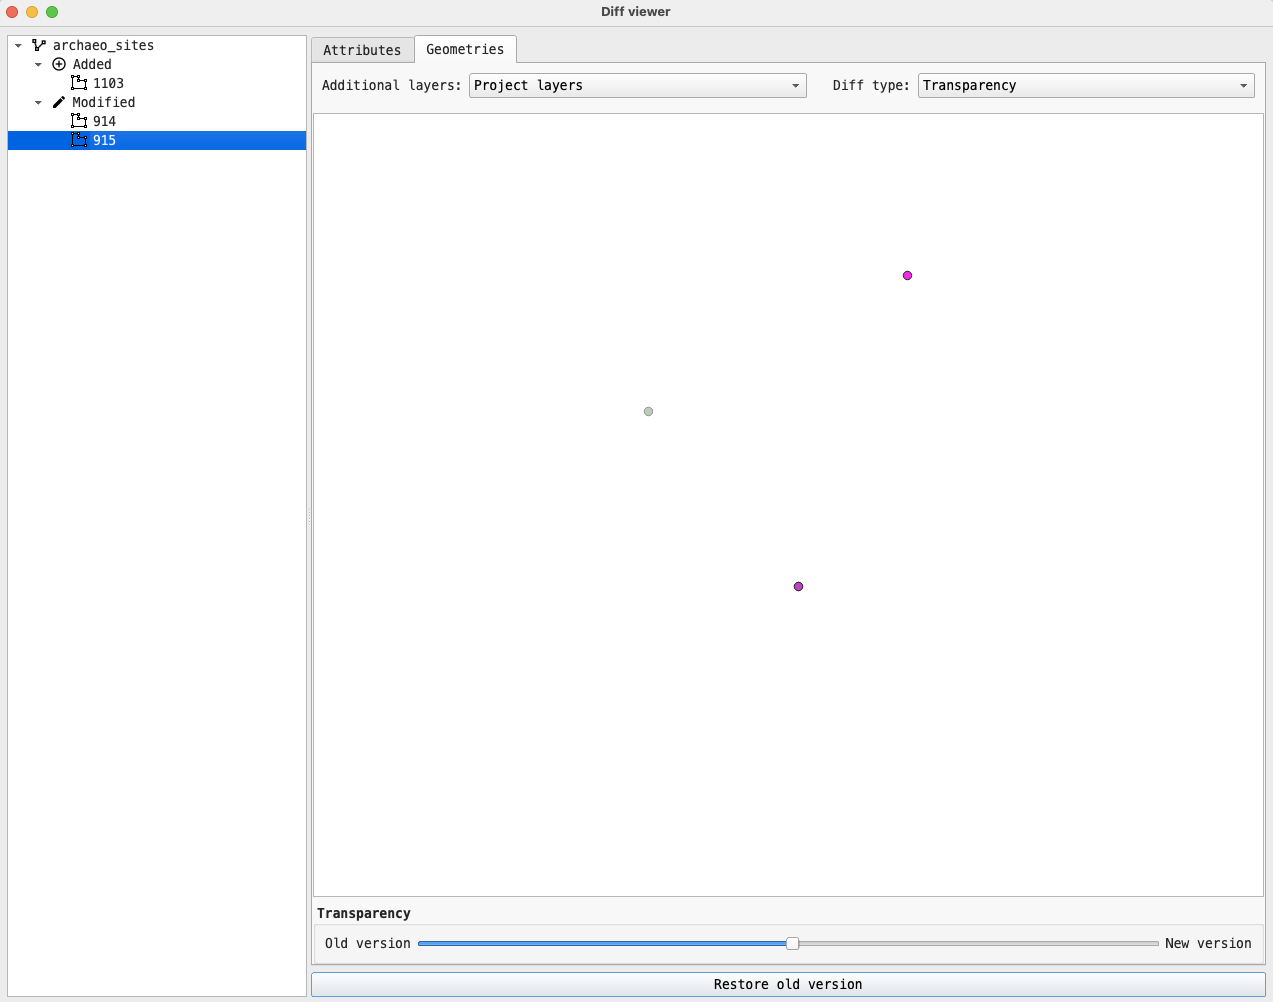
If we switch to the Geometries tab instead, and select the point that we have moved from the list on the left, then we will see how Kart highlights with transparency the previous location of the geometry/nodes and in a darker color the new location.
On the top of the Geometries tab, there are also two dropdown dialogs, one (Additional Layers) related to the layer we want to show in the Diff Viewer in addition to the modified geometries (options are: Project Layer, OSM Basemap, No additional layers), and another (Diff type) related to how we want to visualize the Diff (options are: Transparency, Swipe, Per-vertex diff). We found both transparency and per-vertex diff to be particularly useful in case of polygon geometries.
Note that the kart CLI also offers a way to inspect changes to the working copy, through the kart status and kart diff commands. For example, for the edits that we just made the output would be something similar:
3.5.8 Commit working copy changes
Now that we inspected the changes made during editing, we can commit them, just like git. In QGIS, go back to the kart repositories panel and right-click on our repository, then select Commit working copy changes… (you can also discard them if you noticed some errors). A dialog will pop-up prompting you to enter a commit message. Write a descriptive commit message and then click on “Ok”. A green message at the top should inform you that the changes have been committed successfully (Changes correctly commited).
You can achieve the same by using the CLI through the command kart commit (relevant documentation).
kart commit -m 'YOUR COMMIT MESSAGE'
[main be39e89] your commit message
archaeo_sites:
feature:
1 inserts
2 updates
Date: Wed Apr 10 16:40:04 2024 +0200Add a couple more points or modify existing ones, and make at least other two-three commits, by repeating the same steps above. You can also edit different layers, such has the table layers, or the survey_areas layers.
3.5.9 Inspect the commit tree
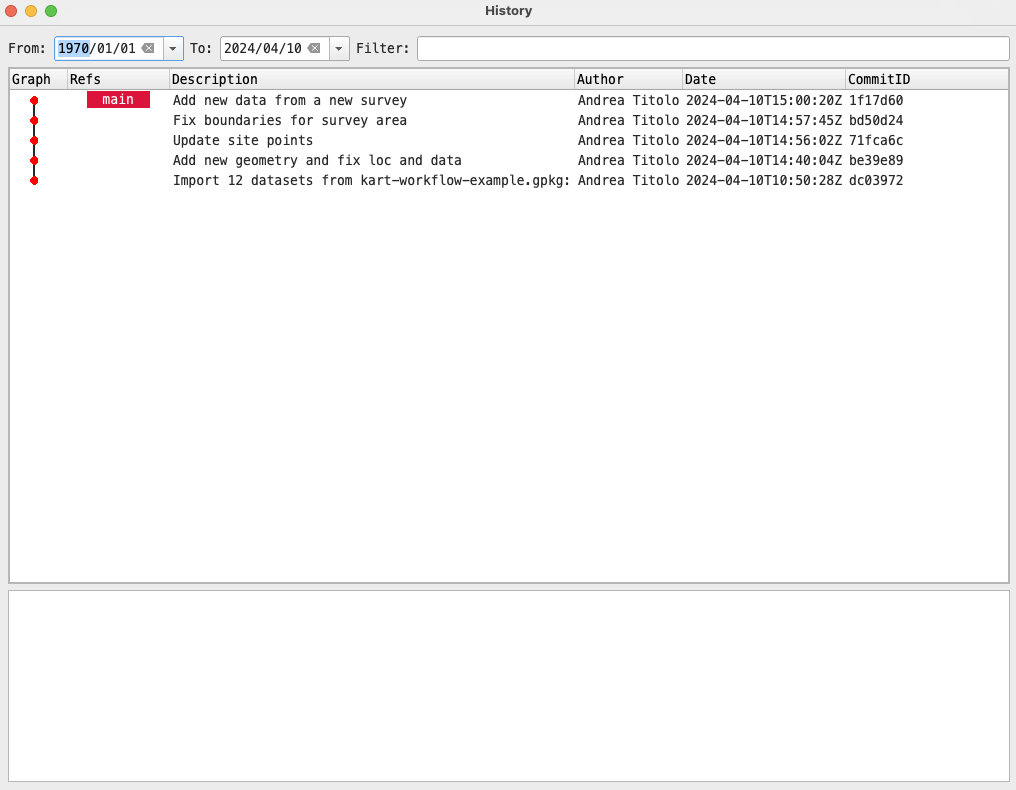
Now that we have more than just a couple of commits, we can use the visual log to inspect commits to our main branch. To access the log, right-click on our repository in the kart panel and click on Show log…
The log panel will appear (if you have worked with VSCode or any other editor providing a git-tree functionality, this will look very familiar). For now it will look rather simple as we are directly committing on a single branch and we have few commits. The corresponding command for the CLI is kart log (note: if you are using pagers for git, these will not work with kart of course)
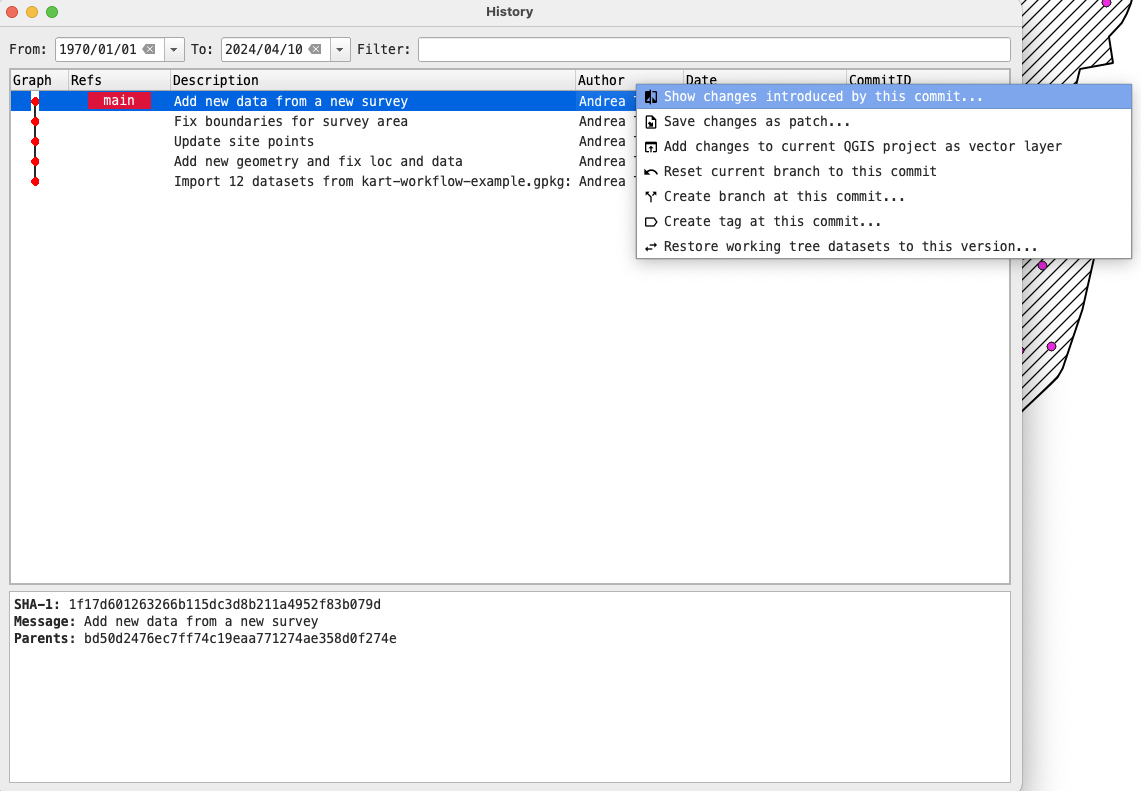
3.5.10 Inspect changes introduced in a specific commit (and other options)
In the QGIS plugin, we can inspect, using the Visual Diff tool, changes introduced by each commit we made. We can bring up a contextual menu by right-clicking on a commit, and a number of options will show. We will not inspect all the options visible in the image below, but they should be self-explanatory, especially if you are familiar with git.
3.6 Collaborating with Kart
While kart is perfectly usable on a local machine only, the goal here is to collaborate with other people. In our workflow, every person can make edits to the layers that need to be worked on. Git is, in general, a very good collaboration tool, and thus kart potentially offers similar advantages. We will explore a very simple worklow: we will simulate one colleague creating a secondary branch from main, adds the edits needed, and then merge back into main, where another colleague have already added geometries to the same layers. Since we are using a geopackage, we will have to deal with conflicts, so we will explore that too.
Here we are using the main branch as an example to avoid too much redundancy, but this is usually not a good practice, as usually is best to have everyone working on secondary branches. As suggested in this comment, it is recommended that one user will do the merge, push the changes, and any other user will use the merged branch as starting point for any new edits in order to avoid further conflicts. This means that after the merge into main is completed and the updated main has been pushed to remote, new edits should be done on new branches created from the updated main branch (after updating the local main branch with kart pull).
3.6.1 Branching
Branching is a common way to implement features and changes isolated from the main working tree and from other people working on the same dataset. The main branch is the default branch upon repository creation.
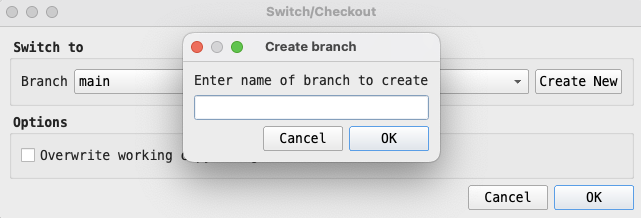
In order to create a new branch, you can use the graphical plugin by right-clicking on the repository name and then click on Switch branch.. On the the new dialog click on Create New. In the new dialog pop-up select the name of the new branch (e.g. dev) and then click on OK.
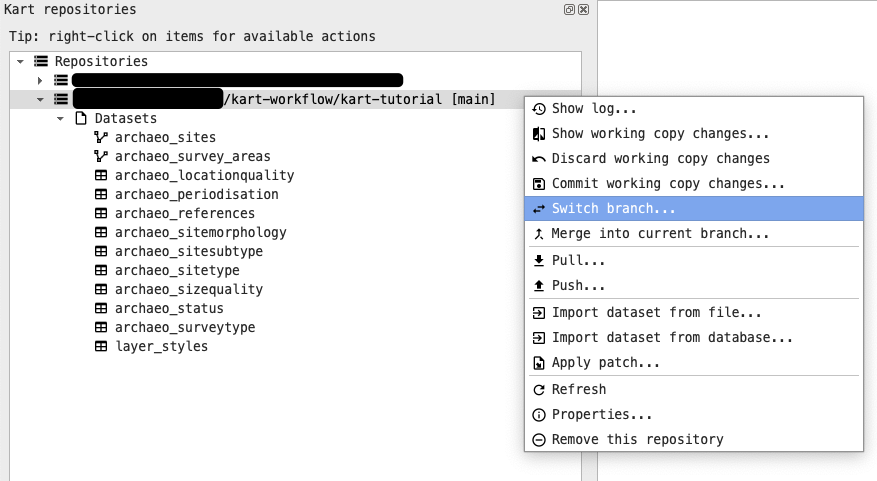
You can reproduce the exact same behavior with less clicks using the following command in your terminal when in the kart repo: kart checkout -b dev.
Your worktree will switch to the new branch automatically. If you need to switch back to main again, from the plugin panel use the same Switch branch.. option and select main from the dropdown menu. From the CLI you can use kart switch main or kart checkout main.
If you use the CLI, the changes should be immediately visible in the plugin panel in QGIS, if that’s not the case, you can refresh using F5 or by right-clicking on the repo and click Refresh.
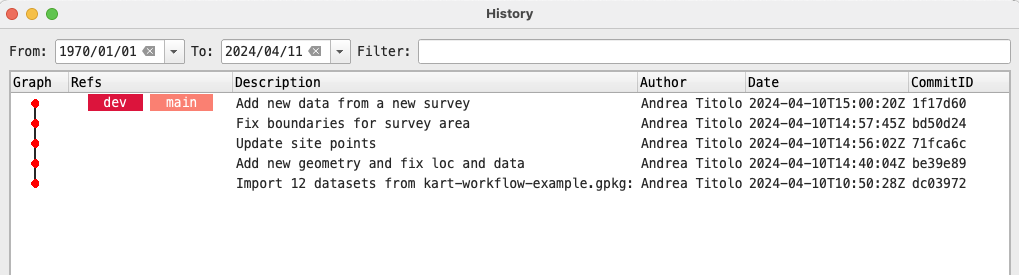
You can also see the two branches (at the same point in the kart tree) using the Show log.. button from the kart repo panel.
For more general information about branches: see the Kart QGIS Plugin docs and the Kart docs and command reference.
3.6.1.1 Add features on the new branch
Let’s now add 3 new points to the archaeo_sites layer while on the dev branch. The procedure is the same as the one highlighted in the previous sections (Section 3.5.5). Let’s also commit this changes and inspect the worktree to see that the dev branch is now ahead of main by 1 commit.
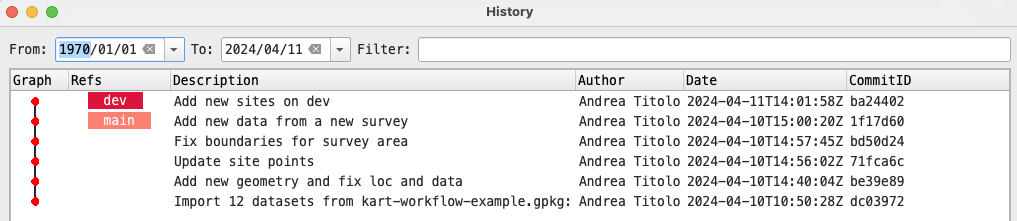
3.6.1.2 Add features to the main branch
To simulate a collaborative situation, switch back to the main branch (using the plugin interface of kart switch) and add 2 points to the same archaeo_sites layer and commit our changes.
3.6.2 Merging
We want our changes on the dev branch to be incorporated on the main branch. To do this we can use the graphical plugin to start a merge. While on the main branch, right-click on the repository and select Merge into current branch.. In the new panel you can provide a merge message and select other options, but for now let’s just make sure to select dev from the dropdown corresponding to Branch.
You can do the same in the terminal by using kart merge dev, make sure you are on the main branch.
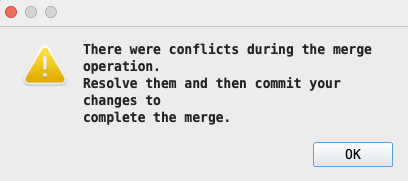
If there are no conflicts, kart will merge using the fast-forward option(thus we will not find a “merge” commit in your commit history) and our branch main will be updated with the edits from the other branch. However, this is not the case now.
If you did like we did above, you will likely see a message telling you that there were conflicts during the merge, and that these conflicts need to be resolved before continuing with the merge.
If you use the command line, you will receive a similar message:
kart merge dev
Merging branch "dev" into main
Conflicts found:
archaeo_sites:
archaeo_sites:feature: 2 conflicts
Repository is now in "merging" state.
View conflicts with `kart conflicts` and resolve them with `kart resolve`.
Once no conflicts remain, complete this merge with `kart merge --continue`.
Or use `kart merge --abort` to return to the previous state.3.6.3 Dealing with conflicts
When conflicts are encountered, the repository enters into a merging state. In this state no changes can be made to the dataset until the conflicts are resolved. Three options are available to us:
- Solve the conflicts
- Continue merge (this will not work until conflicts are solved)
- Abort the merge (return to the previous state before the merge command)
We want to solve our conflicts. When working with geopackages, the most likely conflict comes from conflicting primary keys (in the fid field).
3.6.3.1 Viewing conflicts
To solve our conflicts we need first to see what is actually conflicting. With the QGIS plugin, right click on the repository and select Resolve conflicts…
Currently we are unable to access the graphical tool due to a possible bug in kart, thus we will continue with the CLI only. We will update this tutorial with the relevant info once we get past this issue. If you don’t want to use the CLI, you can try following the kart plugin docs about solving conflicts and then continue on to the next section.
To see the conflicts on the CLI, use kart conflicts to generate a list of conflicting features. While not immediately noticeable, you will see that each feature has a :ours or :theirs after its name, indicating at which branch they pertain, ours meaning the branch you are currently on, and theirs meaning the branch you are mergin from. In our case, ours is main and theirs is yourbranchname (or how your feature branch is called). This view does not really tell you which fields are conflicting, but if you look at the fid you will see that they are duplicated.
3.6.3.2 Solving conflicts
We need now to resolve the conflicts. In git you will be thrown in the text editor, but kart lets us choose the way in which to resolve it. However, the way indicated on the official documentation (kart revolve --with=(ancestors|ours|theirs|delete)) does not include, at the time of writing (2023-12-06) the most suitable option, i.e. automatically renumbering the features. This is instead only documented on a pull request, so we report it here too (note that however the option is visible in the man page using kart resolve --help).
Since Kart version 0.12.3, there is a kart revolve --renumber=(ours|theirs) command that is intended to automatically resolve primary key conflicts during merge operations. The --renumber flag takes one of the two options: ours or theirs, with ours meaning the branch we are currently on, and theirs meaning the branch we are merging from.
Let’s use kart resolve --renumber=theirs or ours by typing the command in our terminal.
We suggest using theirs as to preserve the order of features originally present in the main branch, but feel free to use ours if you prefer (see below).
If there is only a partial overlapping of primary keys, kart will merge those keys that can be merged, while the other features will wait for the conflict resolution to be renumbered. This means that if you have some keys in the yourbranchname branch that do not overlap with primary keys in your main branch, and you use theirs as an option for renumbering, these primary keys will be added first after the keys already present in main (as mentioned here). This will break the sequential order of features from the secondary branch, however, it is more of a visual issue than a real one, unless you are relying on the order of those primary keys for other operations.
After running the command, you should see something like this:
kart resolve --renumber=theirs
Resolved 2 conflicts. 0 conflicts to go.
Use `kart merge --continue` to complete the mergeAs adivides by the CLI, let’s run kart merge --continue to finish the merge (this can be done also in the graphical plugin).
3.6.3.2.1 A note about terminal text editors
By default, you will be prompted to insert a commit message inside a terminal text editor. Which text editor this will be is dependent on your machine, OS, and configuration. If you have set the $VISUAL or $EDITOR variables in your shell, then you will know what will be opened. If not, you will either be put inside nano/emacs or vi/vim.
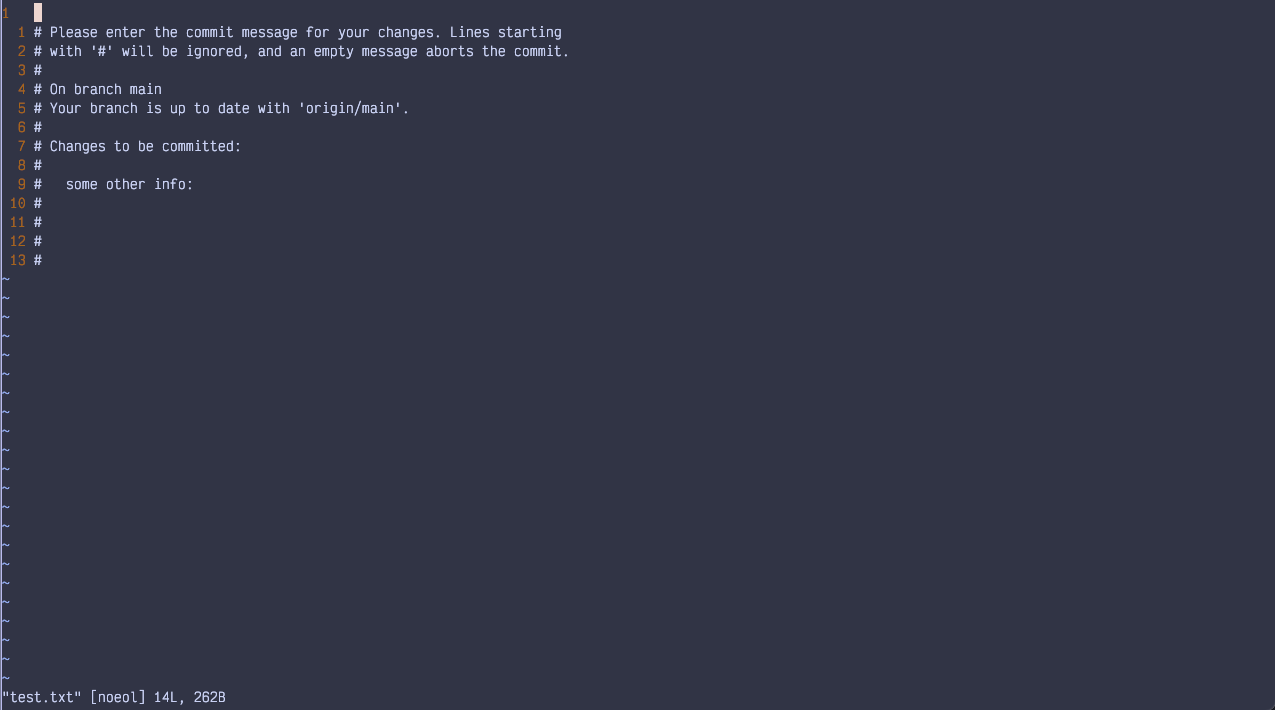
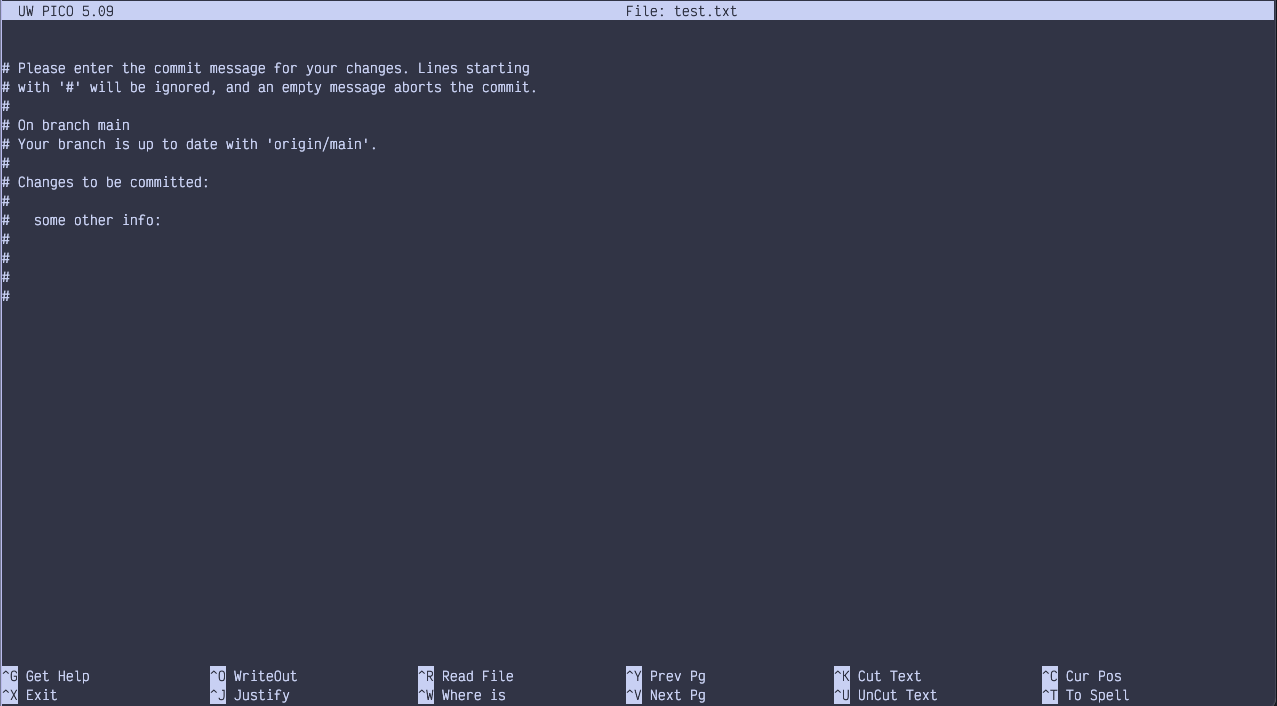
You will already have a commit message written for you, something like Merge branch "dev" into main. You can edit the message (see below) or accept the defaul by using ctrl+x in nano/emacs or :wq in vi/vim.
To edit the message in nano, start typing at the top of the top of the file. When you are finished, the menu at the bottom should tell you how to quit and save. Press ctrl+x (the ^ means ctrl) to exit. When asked to save the buffer, press y to confirm.
To edit the message in vi/vim, press i to be able to type (this might not be necessary). Type the commit message and when satisfied press :q to exit (typing :q! will exit without saving the file).
The text editor will close and the terminal will output the details of the commit and the date, plus some other info.
If everything went well you will see a message like this:
Merging branch "dev" into main
No conflicts!
Merge committed as 890e2455fe81f0e58c5c5bed8cb7010e4fb174f8
Updating kart-tutorial.gpkg ..And your repo will be available to edit again. Check the features and you will see that the main branch now includes also the ones from dev.
You can inspect the worktree to see how the branches diverged and how the merge commit was created.
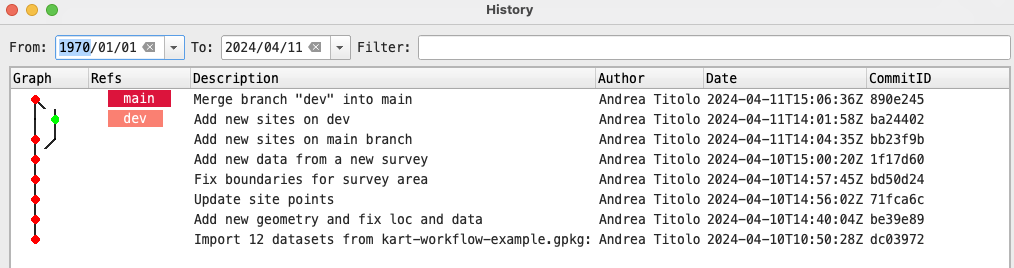
See also Kart QGIS plugin docs and Kart docs on resolving conflicts and ourWiki on the same topic. A useful github issue about solving conflicts in multi-user scenario.
3.6.3.3 Delete branches
Now that we have merged the features, we can safely delete the dev branch to clean our kart repository. To our knowledge this option is still not available through the graphical plugin.
To delete a branch you can use this command kart branch -d dev (the d flag stands for delete).
You should see a confirmation message:
Deleted branch dev (was ba24402).And you can confirm there is only one branch by running kart branch -v in the terminal:
kart branch -a
* mainIf you do not delete you development branch, remember to start new works by creating new branches from the main one, otherwise your might branch from outdated dataset!
3.6.4 Push changes to a remote repository
Let’s say you are finishing your work and you want to backup your data outside of your machine, or you need to collaborate remotely with other people, thus you need to use
3.6.4.1 Connect to a remote repository
Check that the repository has no remotes with kart remotes -v.
If you cloned the repository in the initial steps (Section 3.4), you might see some remotes (if you don’t, skip this part):
kart remote -v
origin https://github.com/UnitoAssyrianGovernance/kart-tutorial.git (fetch)
origin https://github.com/UnitoAssyrianGovernance/kart-tutorial.git (push)You will not be able to make push to these remotes, but to avoid confusion remove these remotes from kart using the following: kart remote rm origin (don’t worry, this will not impact the repository), and confirm again you have no more remotes using kart remotes -v.
3.6.4.1.1 Create a remote repository
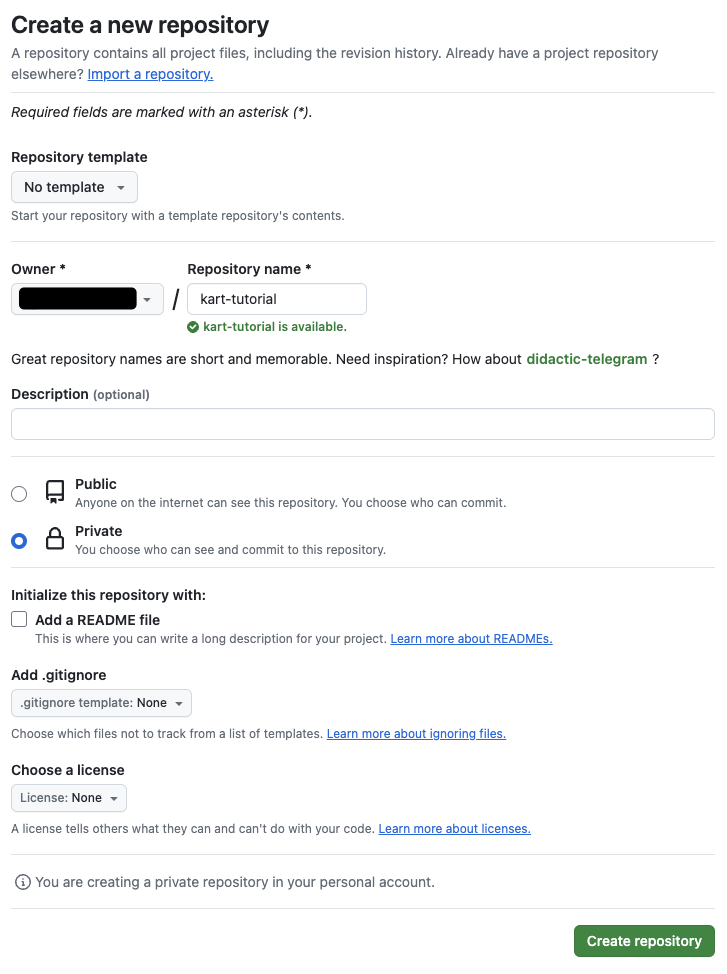
Create a remote repository on your forge of choice, in our case Github, by following the respective instructions.
As a general rule of thumb, if you are creating a repository from one online forges, remember to NOT include any README.md, .gitignore, or other files. Best-case scenario they will be ignored by kart, but worst-case they might break your workflow, as kart will recognize an out-of-sync remote with no real means of fixing it.
3.6.4.1.2 Connect with the kart QGIS plugin
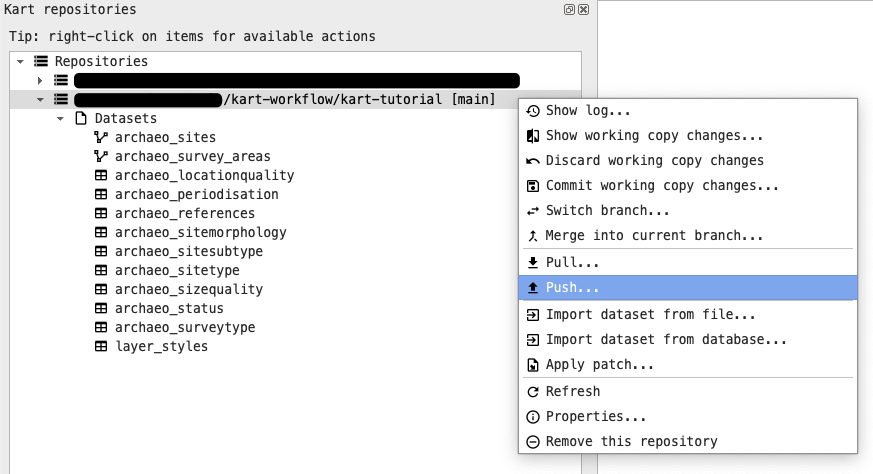
To connect to a remote repository through a graphical interface, right-click on the repository panel and click on Push..
In the new dialog, click on Manage remotes.
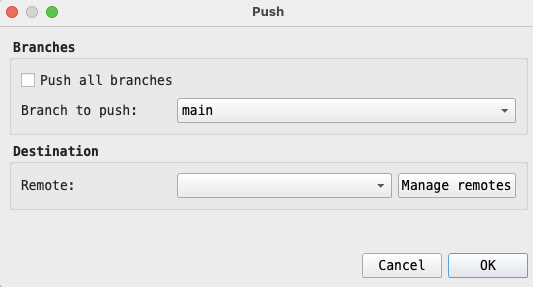
In the new dialog, give a name to the Remote (e.g. github or origin) and the URL you will see after creating the new repository in the previous steps. This URL will be something like https://github.com/yourusername/kart-tutorial.git for HTTPS and git@github.com:``yourusername``/kart-tutorial.git for SSH (see above for HTTPS and SSH in Section 3.2). After adding this information, click on Add New/Save and then on Ok to close the dialog.
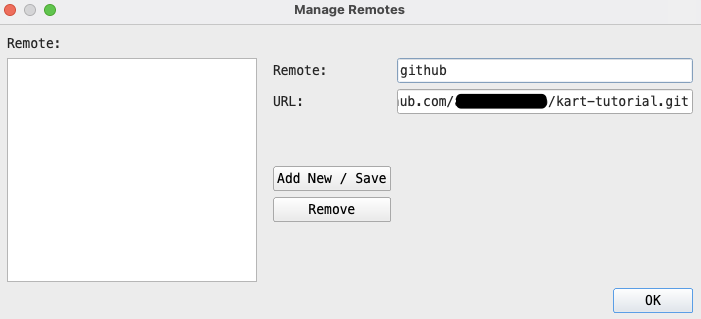
You will be back in the previous panel with the chosen remote added in the dropdown (you can add more than one!).
3.6.4.1.3 Connect with the kart CLI
To add a remote using the CLI, you can use kart remote add origin URL, replacing the URL with the ones mentioned above. Check if the remotes have been added using kart remotes -v once again, you should see two entries with your URL, one for fetch and one for push.
origin is a convention, you can name your remote however you want, just make sure to use the name you choose in the next commands.
3.6.4.2 Push changes
If you are using the graphical plugin, in the Push panel, click Ok. A green message should tell you that the push was successful. If you encounter en error saying that the device is not configured, it is likely an HTTPS authentication issue. You have some options:
- Make sure you are authenticated to github and that git has your credentials stored globally.
- Use the CLI
- Use SSH (which should be more reliable)
Unfortunately the reason for an error might be a lot, if you encounter some reach out to us and we will help as much as we can :)
If you are using the CLI, run kart push -u origin main (origin is the name of the remote, change it accordingly). If you have not set your credentials before, you will be asked for your forge username and token. If not, you will be able to push and you should see something like this in your terminal:
kart push -u origin main
Enumerating objects: 892, done.
Counting objects: 100% (892/892), done.
Writing objects: 100% (892/892), 226.96 KiB | 113.48 MiB/s, done.
Total 892 (delta 0), reused 892 (delta 0), pack-reused 0
To https://github.com/yourusername/kart-tutorial.git
* [new branch] main -> main
branch 'main' set up to track 'origin/main'.Congratulations! your changes have been pushed to a remote repo and are accessible to your collaborators if needed!
In the same way, if you know that your remote has more recent changes that your local machine, you can use kart pull or the respective button in the kart plugin to pull changes from remote.
It is always best to pull changes if you are unsure someone made edits before your work!
3.6.4.3 Addendum: Interact with remote branches
3.6.4.3.1 Push new branches to remote
When using remote repository and different branches, is likely that you will be pushing this branches to the remote repository. Here we will explain how to interact with them. We will provide only terminal commands for simplicity, but you can refer to the previous sections to replicate this with the graphical plugin.
Let’s create a new branch from main by using kart checkout -b feature.
To make the new branch appear on the remote repository, use the push command again: kart push -u origin feature. You will see something like this:
kart push -u origin feature
Total 0 (delta 0), reused 0 (delta 0), pack-reused 0
remote:
remote: Create a pull request for 'feature' on GitHub by visiting:
remote: https://github.com/yourusername/kart-tutorial/pull/new/feature
remote:
To https://github.com/yourusername/kart-tutorial.git
* [new branch] feature -> feature
branch 'feature' set up to track 'origin/feature'.Now you can work on your new branch, push to remote and continue your work.
3.6.4.3.2 Pull new branches from remote
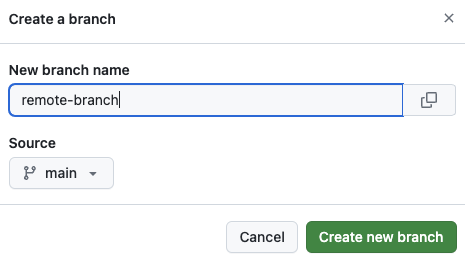
You can also pull changes made by another person from another branch to you local machine. To simulate this, let’s head to your forge of choice (in our case github) and create a new branch from the web interface (most forges should have a way to do that, see e.g. the docs for github).
Create a new branch from Github, using our main branch as source (we can call it remote-branch or anything else you want).
After that, you can use kart pull to pull information from the remote repository, you should see something like this:
kart pull
* [new branch] remote-branch -> origin/remote-branch
Merging 890e245 into feature
Already up to dateAnd running kart branch -a confirm that everything has been updated correctly:
kart branch -a
* feature
main
remotes/origin/feature
remotes/origin/main
remotes/origin/remote-branchYou can see from the above that the remote-branch is only existing on the remote repository, not in your machine (there are two entries for any branch except this one). If you want to work on this branch, you can simply run kart switch remote-branch, and the new branch will be automatically linked to the remote one.
kart switch remote-branch
Creating new branch 'remote-branch' to track 'origin/remote-branch'...3.6.4.3.3 Delete local and remote branches
If you want to delete a local branch that you already pushed on remote, you need some few additional steps.
- Delete your local development branch with
kart branch -d remote-branch, replacing remote-branch with the actual name of your branch. Note that you cannot delete the branch you are currently on, so you will need to switch to another branch in order to delete it. - Use
kart push origin --delete remote-branch, replacing remote-branch with the actual name of your development branch. - If you deleted the branch on the remote forge/github before deleting it locally on your machine, the previous command will fail. You will need to update the remote information locally using
kart fetch --prune, which will usually tell you that the remote branch is deleted. Then you can proceed to delete the local branch as in the step1.
kart branch -d remote-branch
Deleted branch remote-branch (was 890e245).
kart push origin --delete remote-branch
To https://github.com/yourusername/kart-tutorial.git
- [deleted] remote-branchYou can go on your forge to see that the changes have been reflected over there too.
4 Tips
4.1 Selective import tables
4.2 Rename data on import
4.3 Create data from QGIS and start version them with kart
In QGIS, new layers can be safely added to the kart geopackage using the New Geopackage Layer button. However, this layer will not be automatically tracked by kart, which needs to be told manually about their existence:
Since version 0.12.3 (2023-04-26) kart provides the command kart add-dataset. This command tells kart to track layers that are present in the geopackage, but that were not imported through kart import. This command is mentioned in a github issue, but it is not documented yet in the official documentation at the time of writing (2024-04-01), thus we put here a quick reference to document its existence.
The workflow for creating and start versioning new layers in kart is as follows:
Create a new geopackage layer, either from scratch using the “New Geopackage Layer” dialog, or through the “Save as..” option if you have an existing layer already in your project.
Open the terminal (the
add-datasetis still not implemented in the kart qgis plugin) and navigate to the directory where your kart geopackage is located.Check if the layer is indeed present inside the geopackage by running
kart status --list-untracked-tables. You should get something along the lines of:On branch main Your branch is up to date with 'origin/main'. Nothing to commit, working copy clean Untracked tables: THE UNTRACKED LAYERS
NB: if you don’t see any untracked layers, make sure you created/saved the layer in the correct geopackage! NB: kart refers to Vector data as Table Datasets, which is why in the output you will see “tables” and not “layers” (which is more of a GIS concept).
- Run
kart add-dataset YOUR-LAYER-NAME(by replacing YOUR-LAYER-NAME with the actual name of the layer), kart will prompt for a commit message before starting to track the layer.
Note that this also works for the layer styles when saved to the geopackage using the dialog option “Style -> Save as Default -> Datasource Database” (from the layer properties tab). Styles saved in this way are usually saved in a layer_styles table inside the geopackage. We can run kart add-dataset layer_styles to track any changes to the layer styles (check if the layer exists and if it is indeed untracked first).
4.3.1 A note on the commit message when running kart add-dataset
You will be thrown in your terminal text editor (see Section 3.6.3.2.1 to manage the commit message).
4.3.2 Addendum - layer styles
Note that, at the time of writing (2023-11-15), due to a small mishandling of layer_styles schema by QGIS, if your layer name is longer than 30 characters and your style is named with the same name as the layer, you will incur into an error when trying to run kart add-dataset layer_styles. As explained in this issue, this is not a kart bug. We recommend keeping the layer style name (or the layer names) below 30 characters to avoid issues.
5 Useful Resources
5.1 Documentation
5.2 Other resources
5.2.1 Presentations about kart
Coup, R. (2022a). Kart: An introduction to practical data versioning for geospatial.
Coup, R. (2022b). Kart: A Practical Tool for Versioning Geospatial Data.
Coup, R. (2023). 2023 QGIS Data Versioning with Kart.
Olaya, V. (2022). Spatial data versioning with the Kart QGIS Plugin.